Table of contents
Introduction
Magento 2 is an e-commerce software solution that is used to sell products for both B2C and B2B customers all around the world.
When connecting with the Magento 2 API you are required to provide some form of authentication. This can either be:
- (static) API key authentication
- (dynamic) token-based authentication
Alumio offers you the ability to provide these authentications to a web service when making requests, this is done through HTTP Authentications.
For this guide, we will explain to you how to connect Alumio to Magento 2.
Step 1: Create an HTTP Client
This section will explain how to set up an HTTP Client that can be used to consume one or more endpoints of Magento 2.
Step 1a: Setting the basics
To understand how to create an HTTP client you may follow the steps outlined within the following article: Connecting to a REST API.
You will at least need the following three plugins:
- Add base URI to requests
- Log requests
- Formatter: Long
- Add content-type headers to requests
Other plugins may be added as you see fit.
Step 1b.1: Setting up authentication: Bearer token authentication
The most simple way to authenticate to Magento 2 is through a bearer token, as this contains a static API token that only has to be set up once.
To achieve this way of authentication you need to follow these steps:
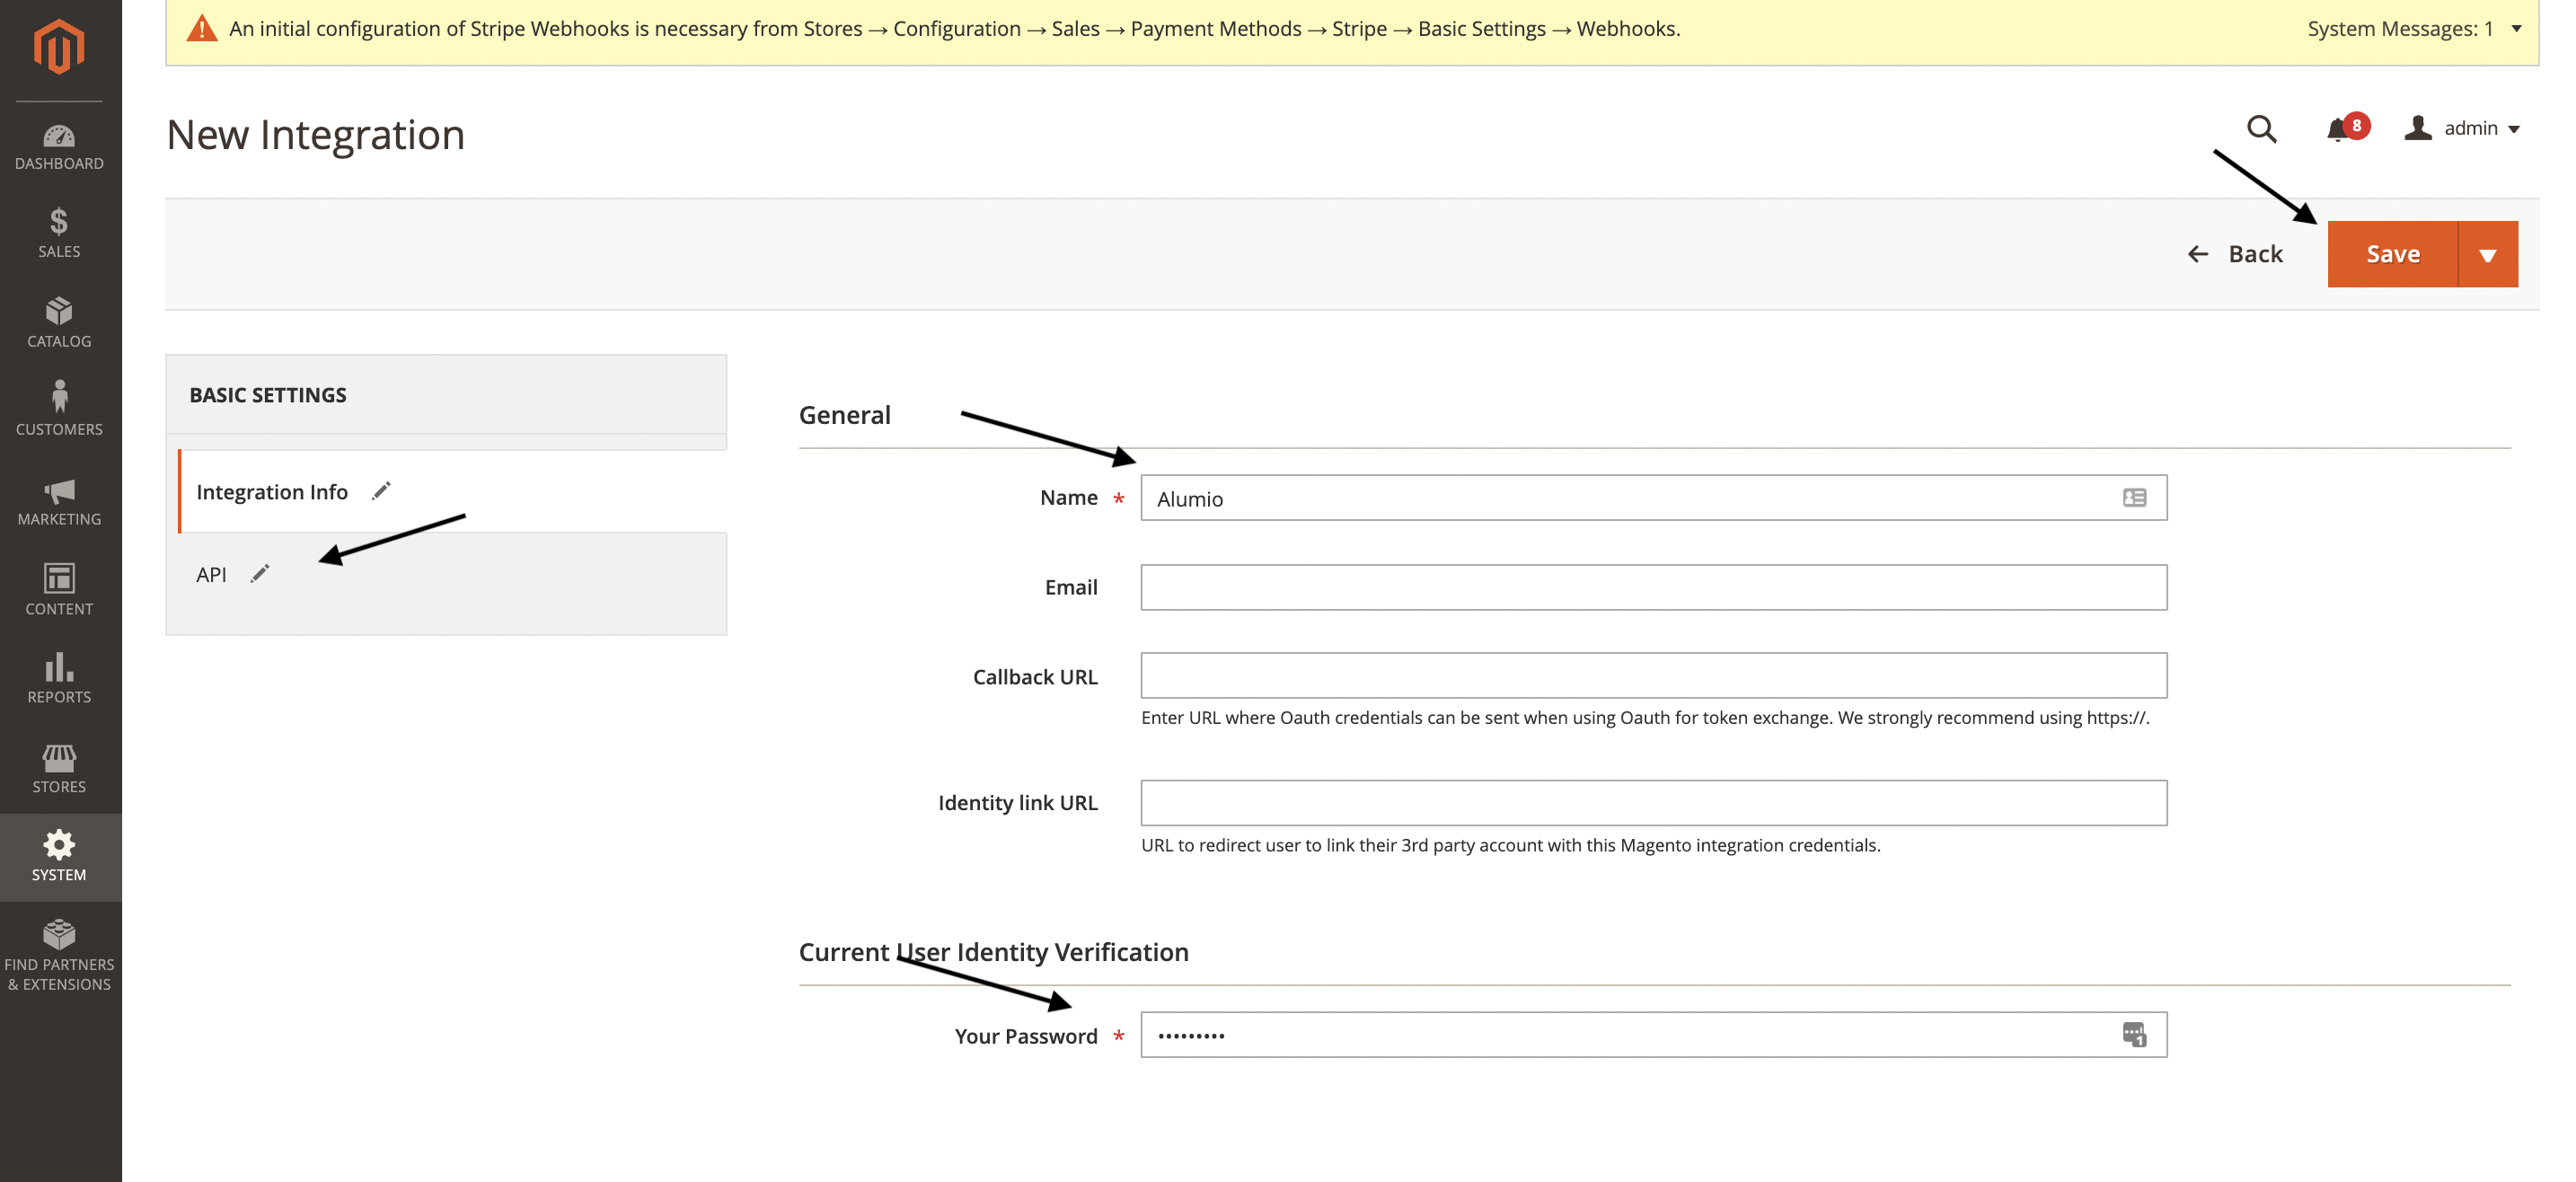
- Within Magento 2, navigate to System -> Extensions -> Integrations
- Click on the upper-right orange button: Add New Integration

- Start by filling out the name for the integration, i.e. Alumio, and password
- Go to the API tab and assign all relevant APIs
- Hit save
- Go back to the Integrations overview page hit Activate
- On the pop-up press Allow
- You will now be given 4 tokens. Take note of the Access token and hit Done

- Within the HTTP client, hit Add new HTTP Authentication
- Select Bearer token authentication
- Paste the Access token within the Token field within Alumio
- Alternatively, you may set up a separate HTTP Authentication configuration to hold this information and use the reference here.

Step 1b.2: Setting up authentication: Request authentication
In case you do not want to work with a static API token, you may opt to go with the token-based authentication functionality offered by Magento 2. This requires you to first fire a request using user credentials which will return an access token that can be used in subsequent requests. Currently, the Request authentication method does not cache the token generated, so it is regenerated every time an API call is being done through the HTTP client.
- Within the HTTP client, hit Add new HTTP Authentication
- Select Request authentication
- The Request URI field should contain the URL to the authentication endpoint
- The Request Method needs to be post for Magento 2
- The Request Parameters should be a object and contain the username and password of the user you want to use to authenticate.
- HTTP Client should be Default client
- A seperate HTTP Client may be needed when there is additional authentication required for the authentication endpoint configured within the Request URI
- The Header name we want to add to subsequent requests is Authorization
- The Source should be from the Request body as Magento 2 returns the generated authentication token within the body of the response
- The Template determines what value the header will be populated with. In our case this should be Bearer &{@[0]}.
- Bearer - This part is static as it determines we want to authorize ourselves using a Bearer token (similarly to the bearer token authentication, but this uses a dynamic token opposed to a static one).
- &{@[0]} - The &{} part indicates a placeholder, or a variable, and indicates to Alumio we want to take data of the response of the authentication call. @ indicates we want to take the entire response. Magento 2 returns a string that contains the token. Alumio interprets this as an array so we use [0] to select this first and only item.

Step 2: Interacting with the HTTP client
Now that you have set up the HTTP client, you can interact with it through an incoming or outgoing configuration. Incoming configurations allow you to read data from Magento 2, while an outgoing configuration will enable you to send data to a Magento 2.
Step 2a: Creating an incoming configuration
Using the HTTP subscriber: Connecting to a REST API
Step 2b: Creating an outgoing configuration
Using the (Chain) HTTP publisher: Connecting to a REST API